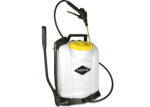
Mesto RS Backpack Sprayer - 18 litre
RS185 knapsack Sprayer with FPM seals giving resistance for acid, neutral or mild alkaline chemicals.
Read More


This knapsack sprayer is manufactured with a rigid polypropylene tank and fitted with FPM chemical resistant seals which will allow you to spray acidic and neutral chemical products. Due to the unique design of our RS range, the tank can be pressurised to 6 BAR (88psi). This is possible as, during operation, the tank is pressurised unlike with most knapsack sprayers where you are not pressurising the tank but pressurising a small compression tube within the tank. The pressurised tank means that there is no requirement to constantly pump this sprayer in order to maintain a spray pattern. This is very useful, especially when using with our long telescopic lances.
Special features of the RS18 sprayer:
• Ergonomically formed shut-off valve with control pressure gauge
• Filling cap with integrated measuring cup and captive loop
• Large base: Safe stand even on an uneven surface
• Extra large filling opening
• Ergonomically shaped integral grip,adjustable in length
• Pump lever can be installed on left or right side
• Functional reliable spray wand holder
• Practical mounting bracket for spray shield on both sides
A review of the RS knapsack sprayers can be found in the 'Our Review' section, simply click the tab to read our review of the knapsack sprayer.
We also have the RS125 Backpack Sprayer which has a 12-litre working capacity and our new Alkaline Knapsack with an 18-litre capacity.
- Unit Height: 0.55m (maximum)
- Unit Weight: 5kg (when empty) 16.5kg (gross maximum weight)
- Maximum Operating Pressure: 6 BAR (87 psi)
- Tank Working Capacity: 18 litres
- Tank Material: Polypropylene
- Carry Position: Back
- Maximum Flow: 1.4 litres/min @ 6 BAR
- Lance: Brass, 50cm length and 360° rotatable
- Nozzle: Brass, hollow cone 1,1 mm
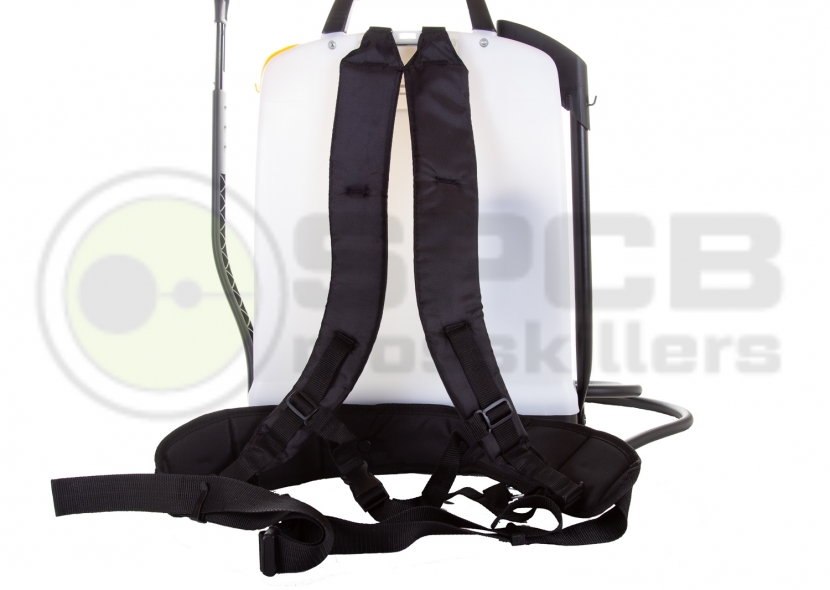
- Padded shoulder carrying straps & back padding
- 20 years spare parts supply GUARANTEED
- Seals FPM - Synthetic rubber with high elasticity properties which makes it a very good product for the protection of seals and O-rings. FPM seals are are highly resistant to hydrocarbons, oils, strong acids, aromatic and chlorinated solvents and has a high temperature resistance.
Overview
The Mesto RS185 has an 18-litre capacity white, polypropylene tank and with a 6 BAR maximum spraying pressure which gives a maximum flow rate of 1.4 litres per minute.
Initial Impressions, Packaging, and Sprayer Manual
Upon receiving the backpack sprayer, I suppose the first thing you see is the box. It is brightly coloured with plenty of good quality, informative photos and with a construction that feels strong enough to both hold and give protection to the sprayer. I, very much, like the way that the carry handle for the tank sits proud of the top of the box so can be used to carry the box.
Upon opening the sprayer box, the first thing I find is an instruction manual. Quite some instruction manual it is too; over 125 pages of instructions and pictures. Okay, so only 8 of the pages are in English but it is still nice to get an instruction manual. This one tells you pretty much everything you need to know, from a welcome message and safety notices through technical information, assembly instructions, care and maintenance information, and a faults guide. Putting the manual to one side for a moment, it is time to have a look at the sprayer. Everything is nicely packed around the tank so removing the sprayer from the box simply requires removing the sprayer hose. With a gentle pull on the handle, the tank lifts easily from the box. My first impression of the sprayer is that it feels substantial and looks good. Likewise the hose and various handles and metal lance. The next step is to assemble it.
Sprayer Assembly
I have a skim through the manual and everything seems straightforward enough. The shoulder straps are already fitted to the tank so there are only five parts to put together. How hard could it be? Not hard at all, especially when you realise that there is a plastic bag inside the sprayer that holds a couple of small fittings. Please don’t forget these as you can’t assemble parts of the sprayer without them.
The first thing I do is attach the hose to the handle and tank. Remember to slip the locking threads onto the hose before doing this. The 1.5 metre hose looks and feels like it could take some real battering. It has a much sturdier feel than many hoses that I have seen with other sprayers, and my impression of the hose matches my overall impression of the sprayer itself. I fit the hose to the sprayer handle in a matter of seconds, but I do find pushing the hose onto the tank fitting to be a little tricky. However, a few extra seconds of pushing and the sprayer hose slips into place. If you find the hose a little hard to push onto the fittings, softening the ends of the hose by dipping them into hot water for a few seconds will help. The metal lance is then fitted to the handle and assembly is nearly finished. The only thing left to do is to fit the pump lever. This can be fitted to either the left or right side of the tank (for left or right-handed people) and comes in two pieces, with a small extension that is pushed into the main pump lever and allows the lever to be set at a length that best suits the operator, with three options to choose from. The main pump lever is fitted to the tank by simply pushing it into a hole at the base of the tank and fitting a locking pin. Once again, you also have a choice of three settings giving you a width to suit the operator. I find this locking pin a bit of a pain to fit, but that is mainly because I am trying to do it in very poor light. Once I move so that I can see something, I manage to line up the holes and the securing pin slips into place.
Assembly only takes a couple of minutes. Obviously, I have put sprayers together before, but I have found the RS range of knapsack sprayers to be some of the easiest I have done. The manual is there to help, although I found the drawings easier than the written instructions.
Sprayer Use
The tank has a 140mm wide neck which makes filling easy. The bright yellow lid is easy to open and close, and there is a plastic filter in the neck which I find easy to remove if not needed. I would, however, recommend leaving it in place so that nothing can be added to the tank that could block the nozzle when spraying. So, with the tank filled, I put the sprayer onto my back. The padded shoulder straps ensure that the sprayer is very comfortable and sits well. Just a little word of advice, the straps need to be clipped to the base of the tank before you can wear it. There is plenty of adjustment in the straps, so all shapes and sizes should be well accommodated.
All that is left is to do some spraying. A few gentle movements of the pump lever and you can see the pressure gauge on the trigger handle start to rise. I like the pressure gauge, I think it’s a great touch. It looks good and is very helpful, letting you know when the 6 BAR maximum pressure has been reached. Pull the trigger and you are spraying.
This knapsack sprayer can be used with our 3.2-metre & 5.4-metre telescopic lance extensions. All you need is one of the connectors which will join the lance handle to the extension handle. I have used this sprayer with the telescopic lance and have found it easy to connect. TIP: I found that locking the trigger of the telescopic lance in the on position and using the sprayer handle to regulate liquid flow the easiest way to spray.
Can I change the side that the compression handle is fitted?
Yes, the handle can be easily moved from one side to the other. It takes a couple of minutes and should be done when the tank is empty of liquid.
I notice that this sprayer can work up to 6 BAR. Do I need this much pressure?
How much pressure you need depends upon what you are spraying and the products you are using. Many products around the home and garden can be easily applied with only 3 BAR however if the liquid is thicker then you will need more pressure. Just because the sprayer can work up to 6 BAR, you don't have to use it at this pressure. This sprayer has a pressure gauge on the handle that gives you visual confirmation of the pressure you are working at, so you choose which pressure is best.
This sprayer can handle acid solutions but can I also use it for alkaline chemicals?
This sprayer is fitted with FPM seals which are very good for most acidic products as well as pH neutral and some alkaline solutions. Therefore, if you are looking to use this sprayer for mainly acidic and neutral products and the very occasional alkaline product then using this sprayer will be fine however, if you are looking to use a lot of alkaline products or strong alkaline products then it is very likely that damage will be caused to the internal parts of the sprayer. For these products we have our RS Alkaline knapsack sprayer which is fitted with EPDM seals which are designed for use with alkaline solutions.
Related products
You may also be interested in...
RS125 Backpack Sprayer - 12 litre
Knapsack Sprayer with 6 BAR maximum pressure & FPM seals for acidic, neutral or mild alkaline chemicals.

Brass Sprayer Extension Lance - 100cm
Brass Extension lance for some of our knapsack, backpack and compression sprayers. 100cm
Baticlean CR
Concentrated moss killer - no rinsing. Kill moss, algae, lichen & mould on all hard surfaces including roofs, walls & patios.
Clinic UP Concentrated Glyphosate Weedkiller
New formulation of glyphosate weed killer - tallow free herbicide. Replaces Clinic Ace and Clinic TF. Supplied in both 1 and 5-litres.
Mesto Knapsack Internal Hose
Replacement internal hose, elbow and threaded collars for the RS range of knapsack sprayers.